How to Install Thule Bike Rack
**Articles may contain links that I earn compensation for if clicked and you make a purchase. As an Amazon Associate, I earn from qualifying purchases. These earnings do not actually impact the price of the product or service.
A hitch bike rack is a convenient tool for avid hikers and people who prefer taking their beloved bikes with them on mountain biking trips. With the idea of mounting your bike on your vehicle, you might be wondering how one can do that.
The installation process is as simple as riding a bike, and there is no rocket science behind it. However, you will need the required tool to mount your bike on your vehicle.
With the bike rack industry gaining fame lately, more and more companies are trying to design racks that make them stand out in terms of ease of installation. Most bike racks are rigid, and you can rely on them to hold your bikes tight on bumpy terrain.
However, the Thule bike rack stands out the most when it comes to ease of installation. In this blog, we have shared a simple step-by-step process of installing a Thule bike rack.

Hitch Bike Rack vs Roof Bike Rack
When it comes to racks, there are mainly two types, i.e., the hitch bike rack and the roof bike rack. Before knowing the process, you need to know which one you should use to get the most out of your mounting experience.
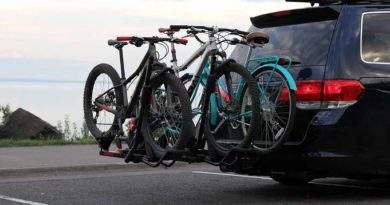
A hitch bike rack or hitch-mounted racks slip into your vehicle’s hitch receiver like the Thule T2 pro. These racks are like bike mounts, easy to assemble and dismantle, and can capacitate up to five steeds.
On the other hand, roof-mounted racks should be used with a roof rack. Once you mount a rack, you will need another rack for mounting your bike. Furthermore, installing a roof rack is as simple as the hitch mount.
It is worth noting that no matter the rack you use, always buy a sturdy lock with it. Simply attaching your bicycle to an unlocked rack is an invitation to bicycle bandits and parking lot thieves.
Your Vehicle Model
More or less, the type of rack you use also depends on the design and model of your vehicle. For instance, experts recommend using a hitch mount-rack for Honda Ridgeline or other similar trucks. The reason behind using a mounting rack is that trucks usually have high roofs equipped with hitch receivers.
Similarly, for models such as Mazda 3, you should use a roof-mounted or trunk-mounted rack. That’s because the hitch doesn’t suit the size of such vehicles; therefore, we use a roof-mounted rack.
Truck mount racks have footpads that should be put against the bottom of your trunk. Moreover, they also have to secure straps that go above your trunk lid. In addition, you can tighten the straps once you have positioned your trunk rack properly.
Furthermore, once you are done with setting your bike, it is good practice to apply downward pressure on your bike to check if it’s sturdy enough.
Before buying a rack, we recommend you check Thule’s website to see if the rack type will suit your vehicle design or not. Moreover, you can also modify your rack to suit your vehicle size and design.
To install a hitch bike rack, you need to have hitches on your car. While most vehicle models come with hitches, there are certain models that don’t.
Before getting a rack, you need to ensure you have hitches in your vehicle. If you don’t have those, you can install them as well.
 How to Install Thule Bike Rack on Your Vehicle
First and foremost, go through the rack manual and your vehicle manual to get an idea of what you might be doing. Although installing a rack is a piece of cake, reading a user manual can make the process even easier.
A hitch bike rack is supposed to be installed under your vehicle’s trunk. Therefore to install it, you will need to get under your car. Once you get underneath your vehicle, locate the hitch and slide a pole into its opening.
After that, you need to screw the bolt through the rack’s opening. Moreover, you can use a socket wrench to ease the process.
Some hitch-bike racks are folded against the trunk while others stick out like trunk racks. If you have a folding rack, you need to unlock your rack and pull it downwards to position it flat behind the trunk.
After that, you need to pull out the arm, locking the wheel. Find the wheel cradles and fold them out.
Load your bike on your rack, putting the back tire first. At a 45-degree angle, lift the locking arms and pull it until it flushes with the tire. Also, it’s best to loop the security straps to your bicycle’s back tire and tighten them at the buckle.
If you have a hitch bike rack that sticks out, then you can follow the same procedure as installing a truck-mount rack. First, you need to slide the tube over the bars that are sticking out from your vehicle and then tighten the security straps.
A front wheel cradle is bigger than that of the back tire because it turns left and right and hence needs more support. Therefore, mounting your bicycle backward will result in your front wheel swinging into your car repeatedly.
Conclusion
Although hitch racks come in all sizes and forms and hence have somewhat varying installation procedures, all processes are simple and quick. With little knowledge of how bike racks work and what type of car you have, you can easily get the job done in no time at all. That said, there are a few do’s and don’ts that you need to keep in mind.
First, you need to find what type of rack you need. Secondly, ensure that the rack suits your vehicle design. Lastly, carefully carry out the steps that we mentioned.
In addition, always ensure to get a lock for your rack as there are joyriders waiting for the first chance they get.


