How to Install a Tankless Water Heater
**Articles may contain links that I earn compensation for if clicked and you make a purchase. As an Amazon Associate, I earn from qualifying purchases. These earnings do not actually impact the price of the product or service.
Doing your own installation can save you a lot in upfront costs, but can also turn to disaster if not done right. Depending on the type of tankless water heater you are trying to install, some are more difficult than others. If you are inexperienced when it comes to piping, gas lines, or electricity, we recommend calling in professional help. Even though it is pricey, it can save you a lot of time and mess. If you do want to attempt this project yourself, we have laid out a detailed guide to help you through the process. In general electric tankless water heaters are much easier to install. With the high price of tankless water heaters, you may want to save on the installation costs. Hopefully, this guide leads you to happy hot water usage.
Different Types of Tankless Water Heaters
Depending on the type of tankless water heater, it can be easier or more difficult to install. The two different types of tankless water heaters include gas tankless water heaters and electric tankless water heaters. They are completely different and each has its own advantages and disadvantages. In general, gas water heaters are much more difficult to install.
-
Gas-Powered
They typically require extensive venting systems since it involves natural gas. This helps to provide the needed airflow to prevent combustion. They also require specific venting materials that many homes do not already have. This may cost you more in upfront costs to modify your home to be compatible with this type of system. The requirements change within the location and over time, so modifications may need to be made. Gas systems do use less power than electric tankless water heaters, which can save you on monthly gas bill costs.
-
Electric-Powered
This type of heating system is usually more compact and easier to install. If you have experience in home improvement this is a project you can tackle yourself. It also does not require extensive venting systems, which add to the flexibility of the location of your unit. The one downside to this option is that it does require a lot of electricity to run in comparison to gas tankless heaters and more traditional tank heaters. This can significantly add to the monthly costs of your electricity bill.
Before You Start
Before you begin, make sure to do all the preparation to make your life easier. The last thing you need is to start and realize you are not able to finish, which leaves you hot water-less for a period of time. Also, check with your area’s requirements, especially for gas tankless water heaters. If it is too extensive, you may be better off calling in professional help.
If you have a gas system, make sure the gas meter is up to date since it may not have enough capacity to power your heater and other appliances. You can always check this by calling the gas company. If a new gas line needs to be installed, a professional is best suited for this job.
- Review our ultimate water heater buyers guide to make sure you have the right water heater and accessories for your application.
- If you really need a storage tank water heater, return the tankless one and get the right water heater for your needs.
- Determine if you need a water softener or reverse osmosis system to provide soft water to your heater.
- If you have mildly hard water or worse, your tankless water heater will be ruined in a very short period of time.
- Make sure you read through the manual and have the required tools to begin the installation.
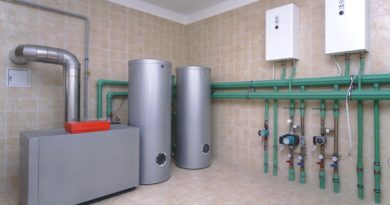
Installing a Gas Tankless Water Heater
We highly recommend a professional for this type of water heater, but if you are familiar with this type of work, we laid out the steps to install your system. Make sure your gas line is updated and is able to handle your new unit.
- Purchase the best tankless water heater.
- Measure your space- This helps you determine where to place your unit.
- Remove the Old Heater:
- Shut off the water supply on the unit or the main supply.
- Shut off the gas supply valves or any power.
- Drain the heater using a hose made for high temperatures. Be sure not to use a regular garden hose for this. TO release the pressure in the system, you can turn on a hot water faucet to fully drain the old unit.
- Disconnect the water and gas lines to the old heater.
- Remove the water heater and dispose of it properly.
- Install the Gas Line
- Turn off the main gas line.
- Install the gas shut-off valve on the line as well as the tee and sediment trap.
- Run the new gas supply line from the tee where you can easily attach it to the new heater
- Make Gas Pipe Connection
- Clean the area and pipe. You can use a sanding cloth and burring tool. Make sure to do this before cutting the copper lines.
- Fit everything together first, then pull the parts apart and clean all the joints and sections with a fitting brush.
- Assemble and solder the fittings and pipe using a torch.
- Run the lines to the new heater.
- Install Pressure Relief Valve
- The manual will tell you how to do this specifically for your system.
- After installing, turn on the water and check for any leaks.
- Turn on the gas and check for leaks. If it is sufficient, turn the gas line off.
- Install Vent
- Apply sealant to the vent shaft and slip on the connector.
- Secure with a hose clamp and connect the section of the vent pipe. Put on the corresponding ring and secure it in place.
- Place the elbow component on the vent on the heater towards the outside.
- Mark the circle, then cut out the hole to create the vent.
- Caulk and place the flange into the drilled hole and secure with screws. Seal all of this with the silicone sealant.
- Connect the vent pipe and hood and replace the corresponding parts of the shingles.
- Turn on the Water
- Plug the water heater and make sure to insulate the pipe.
- Turn on the gas and keep your guard up for any odd smells or leaking.
- Complete any specific procedures your manual states.
You are all finished installing your unit! As always, make sure it complies with all standards and call in a professional if anything goes wrong or you are unsure. Tampering with gas lines can be dangerous, so we recommend erring on the side of caution.
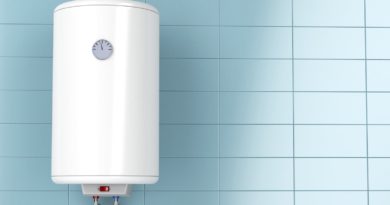
Installing an Electric Tankless Water Heater
This type of system is much easier to install and requires fewer tools and professional skills.
- Turn off the power and all circuit breakers involved.
- Turn off the main water supply to the house.
- Drain the old water heater using a hose and leaving a hot water faucet open.
- Disconnect the old water heater and dispose of it properly.
- Prepare your new unit by removing the screws on the front cover of the tankless unit.
- Use the screws and brackets that come with the unit to mount the heater to the wall or wherever you are placing it.
- Find the cold and hot water connections by using a flex pipe or copper tubing. We recommend installing a shut-off valve since you are installing a new unit anyway. This helps to turn off the supply when you need to turn it off for maintenance. It keeps the rest of your water running.
- Turn on your hot water faucets to let the air run through while checking for leaks. After a few minutes, close the outlets.
- Use the manual to make the correct wire and circuit breaker connections. Some units differ from others, so it is important to check the manual. To make this connection, cut the wire to the correct length and feed it through the housing through the bottom to the terminal. Every circuit should be connected to the busbar and panel. It is important to line up the correct number and size. Make sure to double-check all the connections before starting the system.
- Attach the front cover and turn on the circuit breakers.
- The system should turn on and if not, check all the connections again. When it is on, you are able to adjust the water temperature and other preferences.
- Turn on a hot water faucet and give it a few seconds to stabilize temperatures.
With that, the installation of your electric tankless water heater is done. Even though it does take a bit more energy to run an electric system, it is much easier to install.
Final Tips
If your home requires large amounts of hot water, a tankless system can be great for you. They are less bulky and limiting than traditional water heaters. They provide instant hot water to your home, and there is no need to fight over hot water anymore. For any seasoned DIYer, an electric tankless water can be installed easily. Even for those that do not usually work on home improvement projects, this guide gives you a comprehensive breakdown of all the steps you need to complete an installation. For the gas alternative, it can get a bit tricky with all the venting and specific requirements, but if you feel comfortable with attempting the task, it can save you a great deal in installation costs. Always be sure to check the manual and specific requirements of your area. We wish you happy hot water usage!